McKenzie therapy for lower back pain and leg pain (sciatica) includes a set of backward and forward-bending therapeutic exercises formulated to relieve acute leg pain and restore motion in the spine.
The exercises are meant to be continued even after the pain subsides or goes away – in order to treat the underlying cause and prevent recurrences.
In This Article:
- What Is the McKenzie Method for Back Pain and Neck Pain?
- 7 McKenzie Method Exercises for Back Pain and Sciatica
- 7 McKenzie Method Exercises for Neck Pain and Arm Pain
- Video: What Is the McKenzie Method?
Illustrations and Instructions for 7 McKenzie Method Exercises for Back Pain and Sciatica
McKenzie’s back exercises are performed in lying and standing positions and involve backward and forward (extension and flexion) bending movements.
If the leg pain moves closer to the buttocks or lower back, resulting in a tolerable increase in the lower back pain, it is considered a good sign as it indicates pain centralization (movement of pain from the leg closer to the spine).
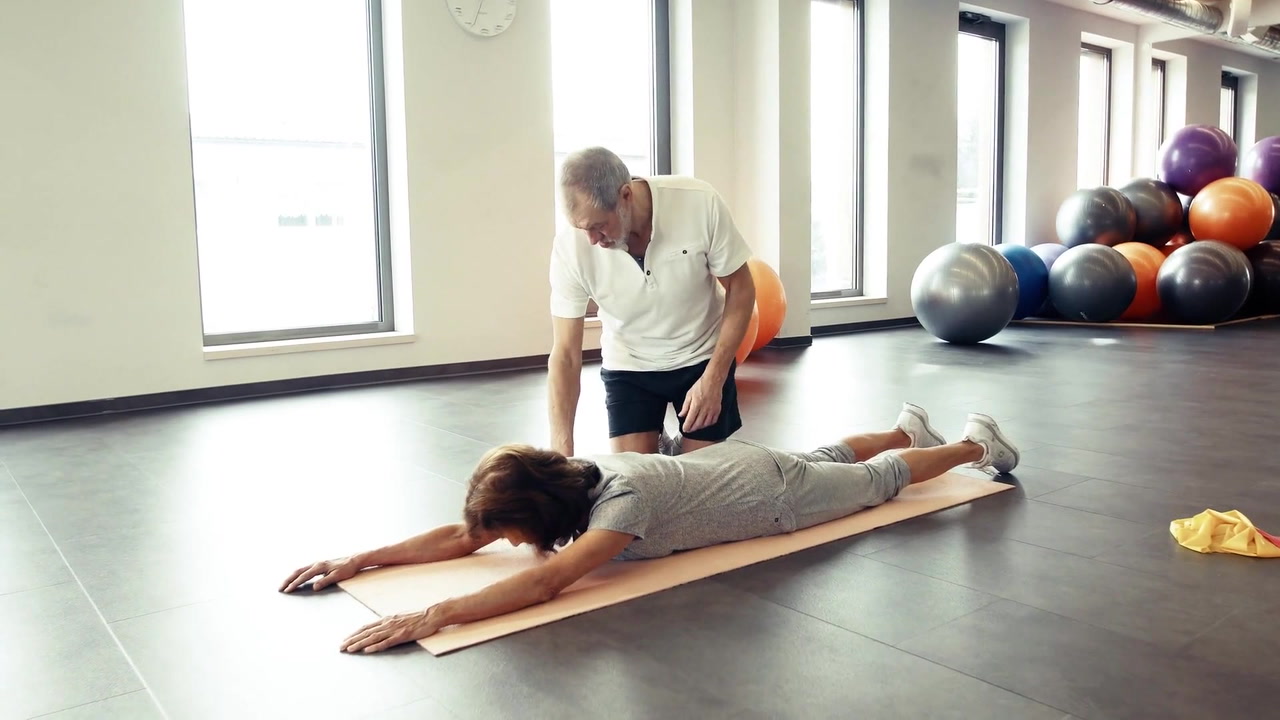
The exercises should be performed under the guidance of a trained therapist. Numerous modifications can be made in position and amount of force applied to the spine, so if you are unable to find relief with these exercises, a trained practitioner may be able to personalize them better for you.
If the back and/or leg pain symptoms worsen or become intolerable, preventing you from performing these exercises, a physician should be consulted before attempting any of them.
Back exercise #1: Lying face-down
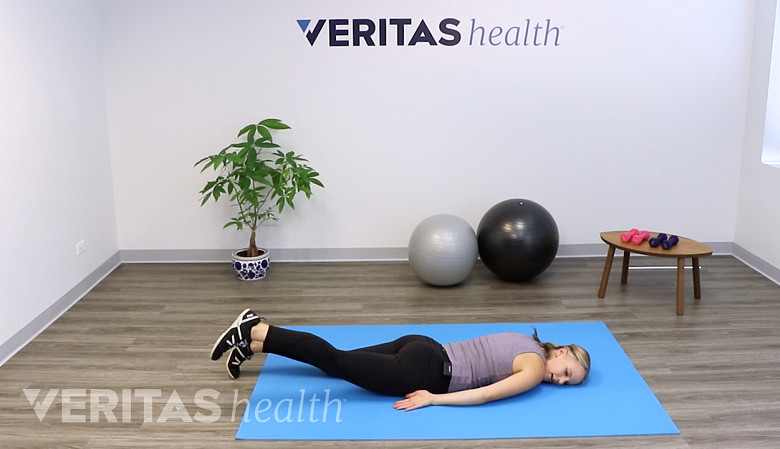
To perform the first back exercise:
- Lie face-down on a flat, sturdy surface.
- Keep your arms straight and relaxed by the side of the body.
- Turn your head to one side.
- Make a conscious effort to remove all tension from the low back, hip, and legs – the exercise will not be beneficial without keeping the body in a completely relaxed state.
Take a few deep breaths in and out, and then relax for 2-3 minutes.
This exercise prepares the body for the second exercise.
Back exercise #2: Lying face-down in extension
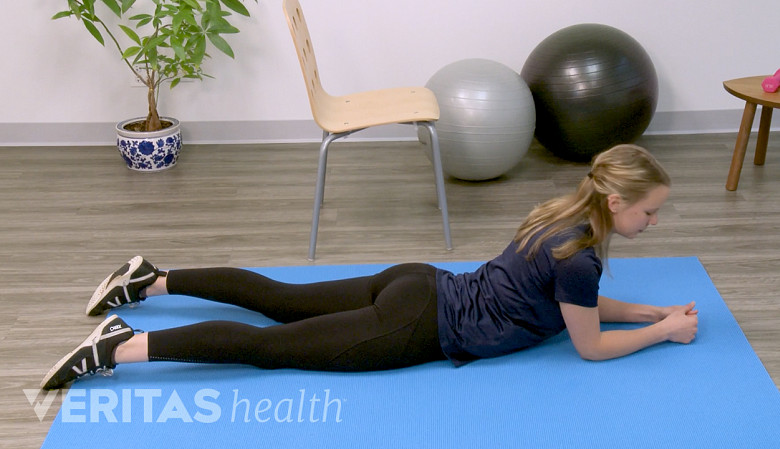
The second exercise is done only after completing the first exercise. To perform this exercise:
- Start in the lying-down position as in exercise 1.
- Place both elbows under the shoulders and push the upper body up, leaning on the forearms.
- Keep the hips steady on the ground.
- If this exercise is painful, move your elbows farther away from the body to lower the top half of your body to a tolerable point.
- Alternatively, place a pillow under your chest to support your upper body.
- Similar to exercise 1, a conscious effort must be made to remove all tension from the low back, hip, and legs.
- Maintain this position for 2 to 3 minutes with controlled, deep breathing.
Perform this exercise only once per session, and evenly spread the sessions 3 to 4 times a day.
Exercises 1 and 2 prepare the body for the third exercise.
Back exercise #3: Extension in lying
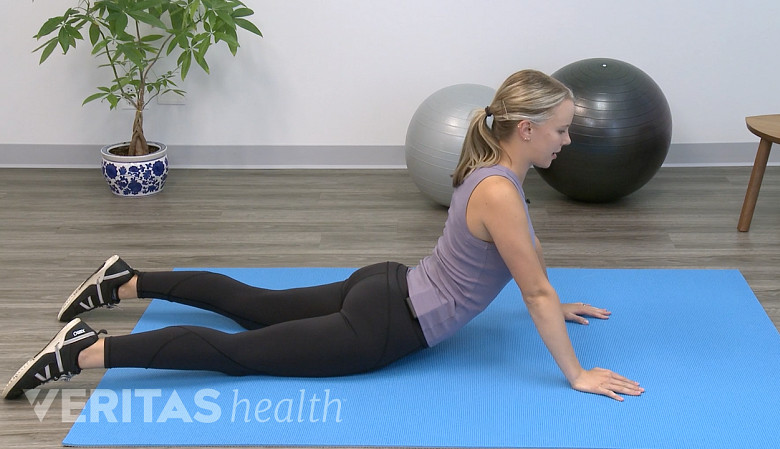
Extension means bending backward.
The third exercise is done only after completing the first and second exercises, and it should be attempted only if leg pain has not worsened in the previous positions.
To perform this exercise:
- Start in a face-down position with the head forward rather than to the side.
- Place both your hands under the shoulders.
- Gently push up and straighten the elbows.
- Keep your hips on the ground and only push up as far as tolerable.
- Keep your lower body in a completely relaxed position. Allow the pelvis and legs to sag or sink into the ground.
- Hold this position for 1 to 2 seconds and return to the lying-down position.
Perform 10 repetitions of this exercise every 2 hours during the day.
With each repetition, aim to push the body higher than before.
Back exercise #4: Extension in standing
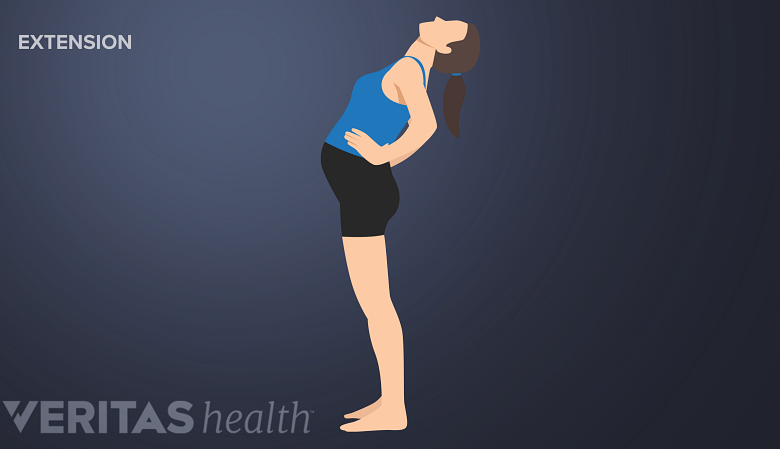
For some individuals, exercise 3 might be uncomfortable or challenging, or their spine may lack the flexibility needed to perform the extension movement correctly. In such cases, extension in standing offers an excellent alternative.
To perform this exercise:
- Stand upright with feet slightly apart.
- Place the hands in the small of the back (the curved area in the low back).
- Using the hands as a fulcrum, bend the upper body backward at the waist as far as possible without pain.
Hold this position for 1 to 2 seconds and return to the starting position. Perform 10 repetitions of this exercise every 2 hours during the day.
With each repetition, try to bend farther than before, if possible.
If it is challenging to remain balanced while performing this exercise or if you feel discomfort in your shoulders, an alternative is to stand with your lower back against a countertop and use the countertop as a fulcrum to bend backward.
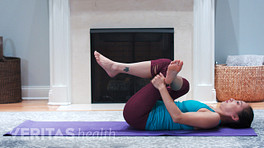
Back exercise #5: Flexion in lying
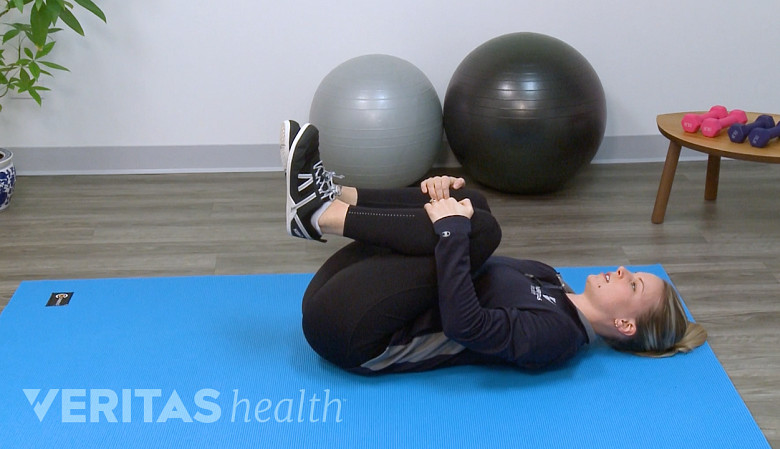
Flexion means to bend forward. To perform this exercise:
- Lie on your back with your knees bent and feet flat on the floor.
- Slowly lift both feet and bring the knees close to the chest.
- Wrap both hands around your knees and pull the knees as close to the chest as possible.
Hold this position for 1 to 2 seconds.
While performing this exercise:
- Do not raise the head
- Do not straighten the legs at any point
Perform 10 repetitions of this exercise every 2 hours during the day.
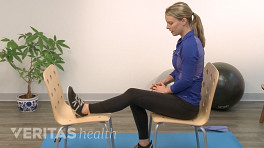
Back exercise #6: Flexion in sitting
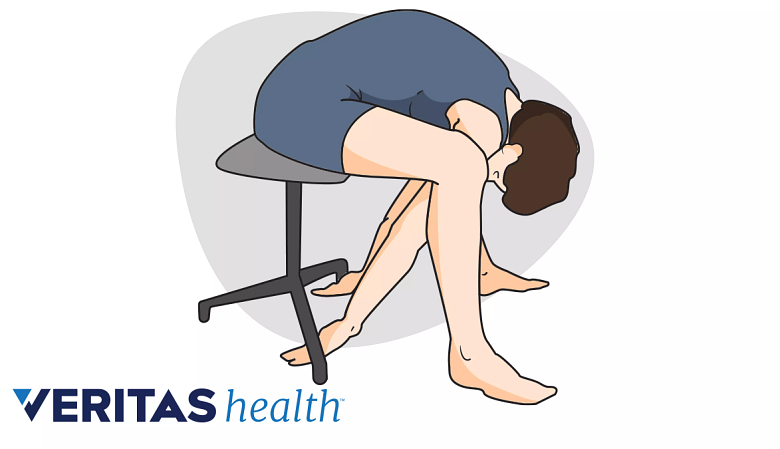
This exercise is recommended only after doing exercise 5 consistently for at least 1 week, and it should be attempted only if leg pain has not worsened in the previous positions.
To perform this exercise:
- Sit on the edge of a chair with knees and feet apart and both hands on the thighs.
- Bend forward at the waist and hold the ankles or touch the floor
- Return to the starting position immediately.
Perform 10 repetitions of this exercise every 2 hours during the day. With each repetition, try to bend farther than before, if possible.
Back exercise #7: Flexion in standing
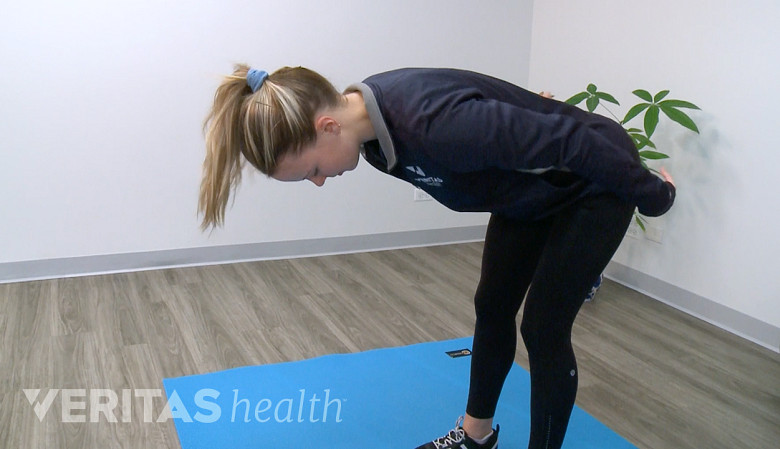
This exercise is recommended only after doing exercise 6 consistently for at least 2 weeks.
To perform this exercise:
- Stand upright with feet apart and arms by the side of the body.
- Slowly fold down at the waist and move your hand along your leg as far as possible without pain.
- Return to the starting position immediately.
Perform 10 repetitions of this exercise every 2 hours during the day. With each repetition, try to bend farther than before, if possible.
When and How to Do the McKenzie Method Back Exercises
The 7 back exercises are performed in phases depending on the severity of symptoms and duration of pain. Following the recommended number of repetitions and sessions provides the full benefit of the exercises. Exercises 1 through 4 are not suitable during pregnancy.
- When in acute, constant pain, perform exercises 1 and 2, and move on to exercise 3. If exercise 3 cannot be performed due to acute pain in a lying-down position, perform exercise 4 after exercise 2.
1
McKenzie R, Kubey C. 7 Steps to a Pain-Free Life: How to Rapidly Relieve Back and Neck Pain Using the McKenzie Method. Updated edition. Plume; 2014.
Continue to perform exercises 1 through 4 for the first few days until the acute pain subsides. 1 McKenzie R, Kubey C. 7 Steps to a Pain-Free Life: How to Rapidly Relieve Back and Neck Pain Using the McKenzie Method. Updated edition. Plume; 2014.
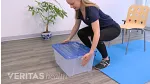
Immediately after completing an exercise session, lie on your back for a few minutes and insert a rolled-up towel or lumbar (low back) roll under the low back to maintain the spinal curve. 1 McKenzie R, Kubey C. 7 Steps to a Pain-Free Life: How to Rapidly Relieve Back and Neck Pain Using the McKenzie Method. Updated edition. Plume; 2014. - When the acute pain has reduced, continue exercises 1 through 4 and slowly introduce exercise 5. After at least 1 week of performing exercise 5, exercise 6 may be introduced into the workout sessions.
1
McKenzie R, Kubey C. 7 Steps to a Pain-Free Life: How to Rapidly Relieve Back and Neck Pain Using the McKenzie Method. Updated edition. Plume; 2014.
- When exercise 5 becomes tolerable and improves flexibility in the low back, it can be stopped and exercise 6 may be started. 1 McKenzie R, Kubey C. 7 Steps to a Pain-Free Life: How to Rapidly Relieve Back and Neck Pain Using the McKenzie Method. Updated edition. Plume; 2014.
- When exercise 6 becomes tolerable, it may be stopped and exercise 7 can be started. 1 McKenzie R, Kubey C. 7 Steps to a Pain-Free Life: How to Rapidly Relieve Back and Neck Pain Using the McKenzie Method. Updated edition. Plume; 2014.
Exercises 5, 6, and 7 must always be followed by exercise 3 and a short period of rest thereafter with the lumbar roll. 1 McKenzie R, Kubey C. 7 Steps to a Pain-Free Life: How to Rapidly Relieve Back and Neck Pain Using the McKenzie Method. Updated edition. Plume; 2014.
- When there is no pain or stiffness:
- Perform exercise 3 every morning and evening to prevent a recurrence or flare-up of back pain. 1 McKenzie R, Kubey C. 7 Steps to a Pain-Free Life: How to Rapidly Relieve Back and Neck Pain Using the McKenzie Method. Updated edition. Plume; 2014.
- Perform exercise 4 before and after heavy lifting and at regular intervals during sitting to keep the back conditioned. 1 McKenzie R, Kubey C. 7 Steps to a Pain-Free Life: How to Rapidly Relieve Back and Neck Pain Using the McKenzie Method. Updated edition. Plume; 2014.
- Perform exercise 7 once or twice a week to maintain flexibility in the low back. 1 McKenzie R, Kubey C. 7 Steps to a Pain-Free Life: How to Rapidly Relieve Back and Neck Pain Using the McKenzie Method. Updated edition. Plume; 2014.
During each session, the exercises should progressively alleviate symptom severity or make them tolerable. Despite occasional pain flare-ups, as in exercise 3, symptoms are expected to diminish after subsequent sessions. 1 McKenzie R, Kubey C. 7 Steps to a Pain-Free Life: How to Rapidly Relieve Back and Neck Pain Using the McKenzie Method. Updated edition. Plume; 2014.
If any exercise increases the severity of symptoms hindering the continuation of the workout program, consultation with a physician is advised.
- 1 McKenzie R, Kubey C. 7 Steps to a Pain-Free Life: How to Rapidly Relieve Back and Neck Pain Using the McKenzie Method. Updated edition. Plume; 2014.